
While we begin to enjoy the magic of the holiday season, one thing that is important to me is teaching my kids to recognize things that they are thankful for. I find that the best way to do this is through a Thanksgiving craft. In the past we have made thankful turkeys out of construction paper and taped them to the wall, but I loved the idea of getting a little more crafty this year and making our own Thankful Tree! This is the perfect craft to do over a chilly weekend because it consists of several smaller, easy-to-do, fall crafts that are combined to create the final Thankful Tree.
Part 1: Acorn Process Art
Process Art Acorn Craft
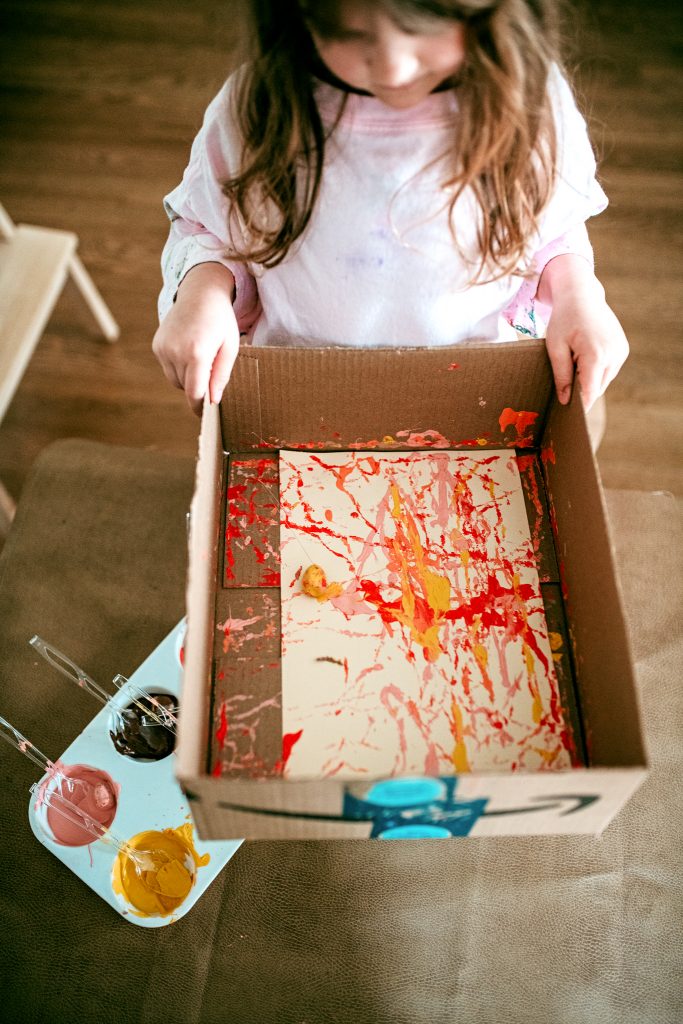
First up is a fun process art project that is suitable for all ages ! Process art is referred to as such because the focus lies more in the creation of the work, not the outcome. Harper has always been somewhat of a perfectionist in her artwork (seriously I remember her at probably 18 months old throwing a fit because her cow scribble didn’t look like my cow doodle) , so process art is always a fun way to get her to let go of her expectations a little bit!
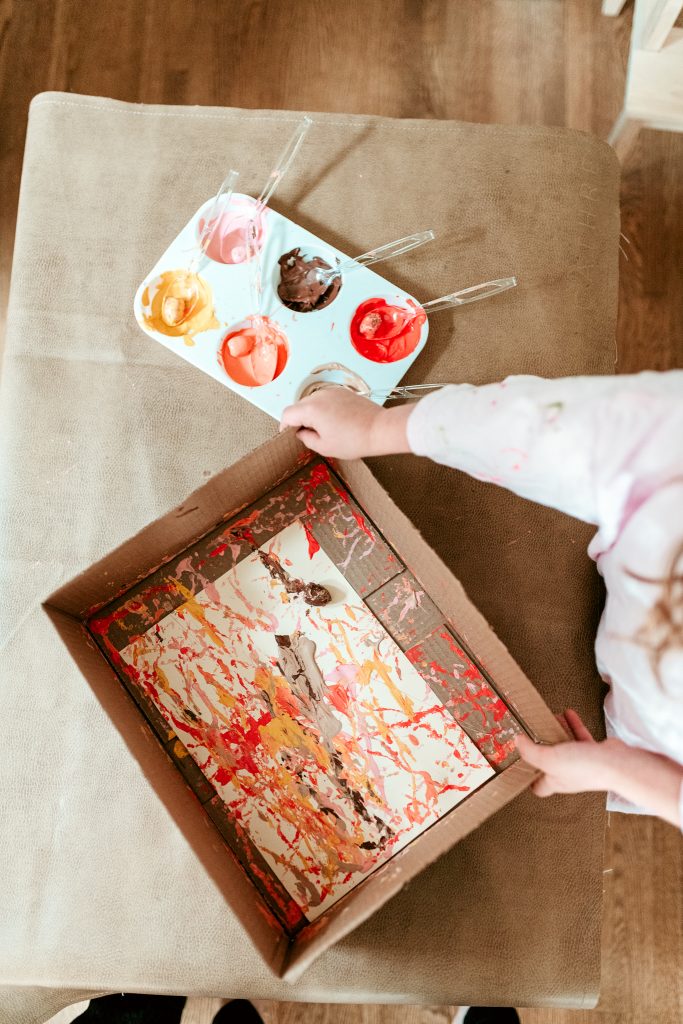
For this project we will need:
- A paper-sized box or container
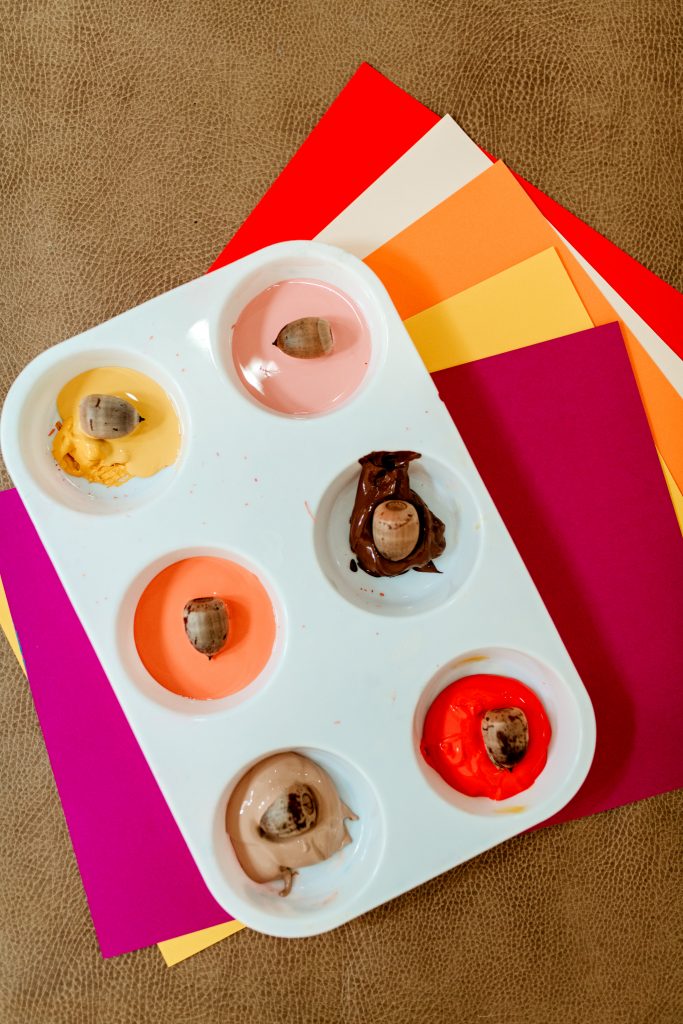
- Fall colored paint
- Fall colored paper (cardstock works best)
- Acorns
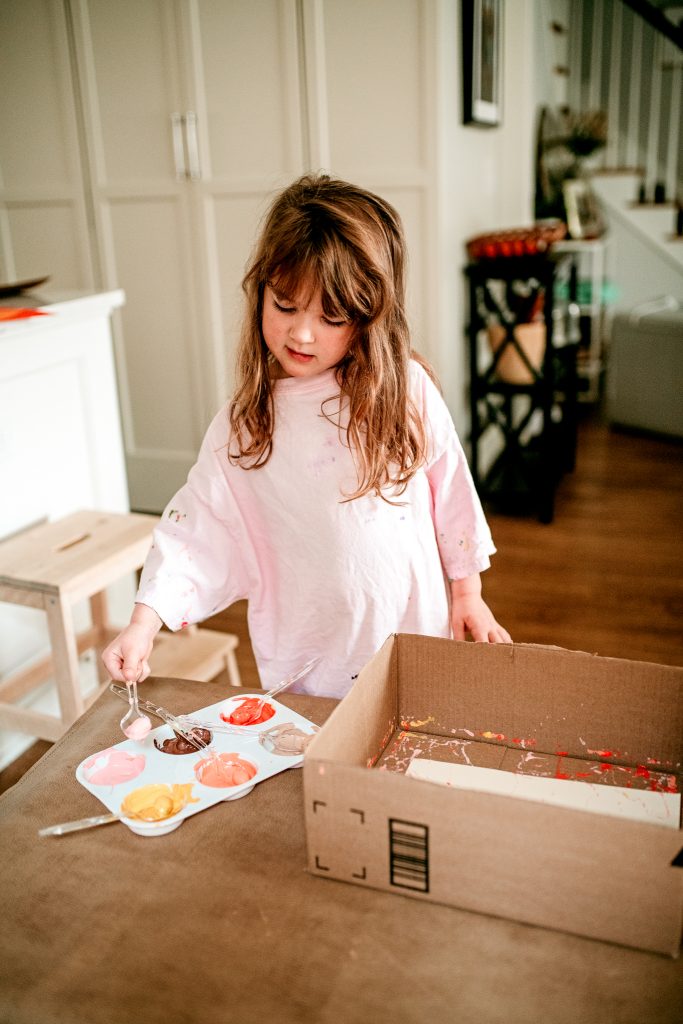
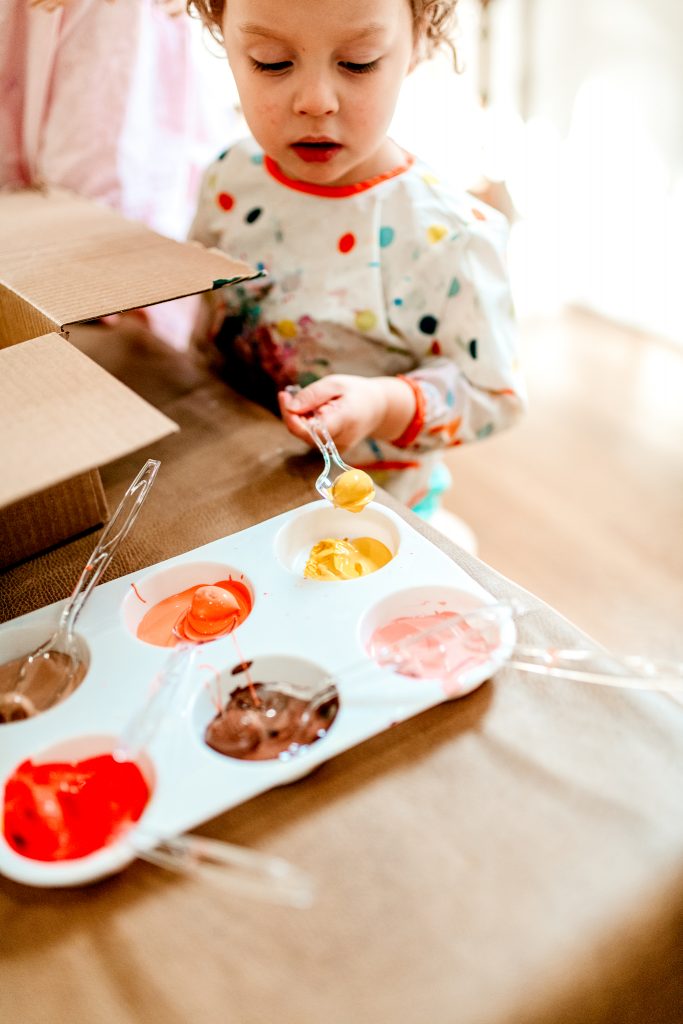
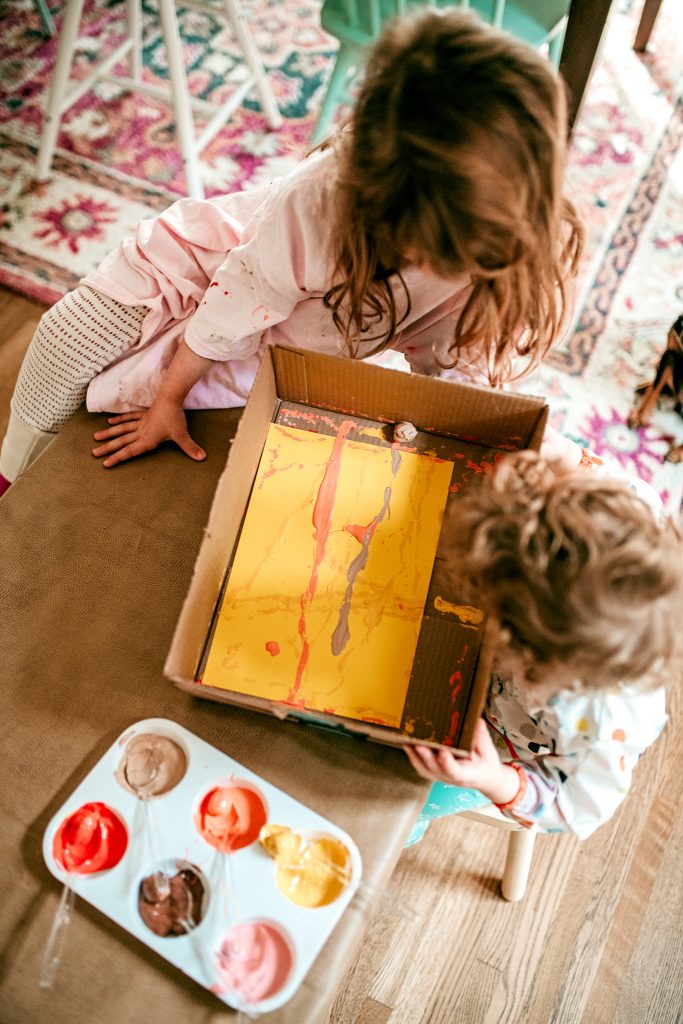
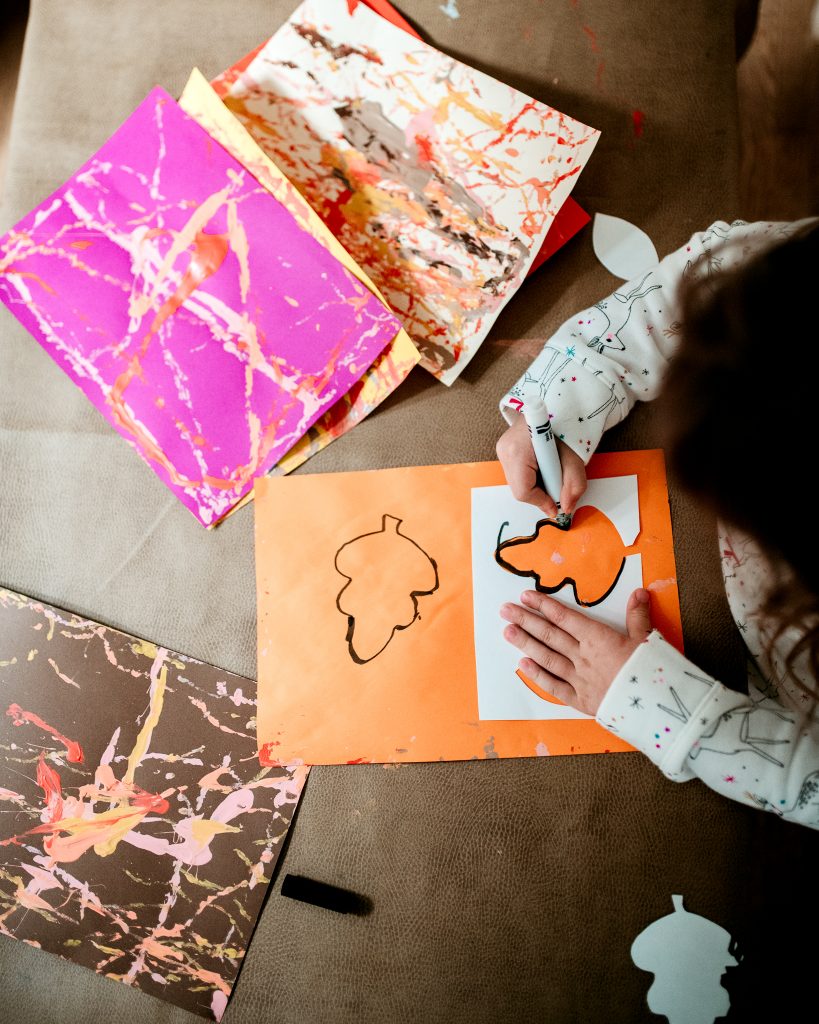
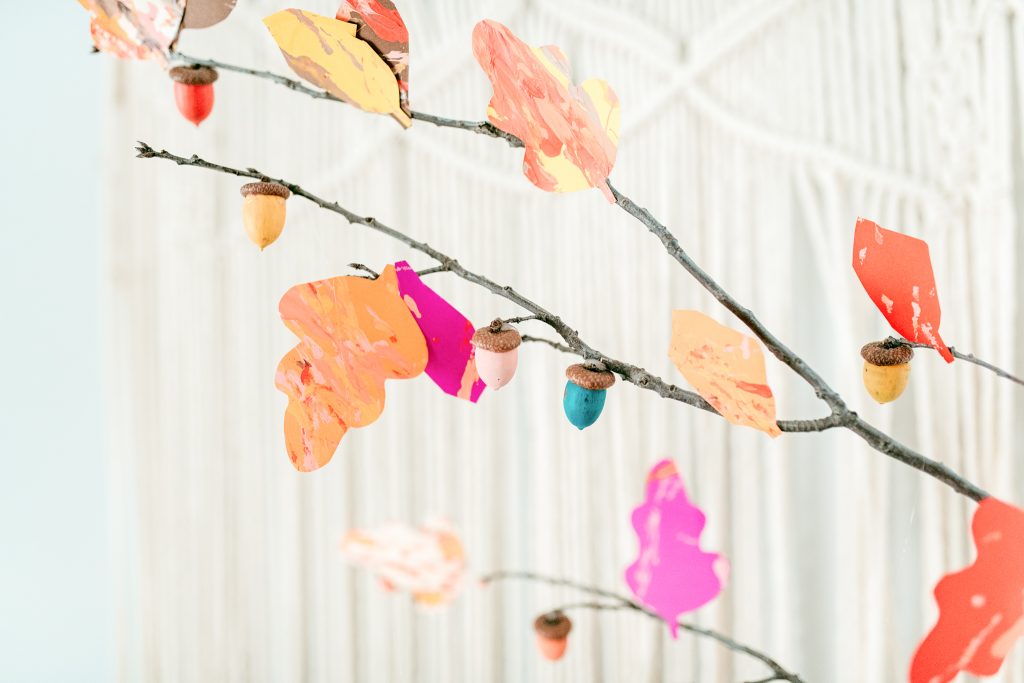
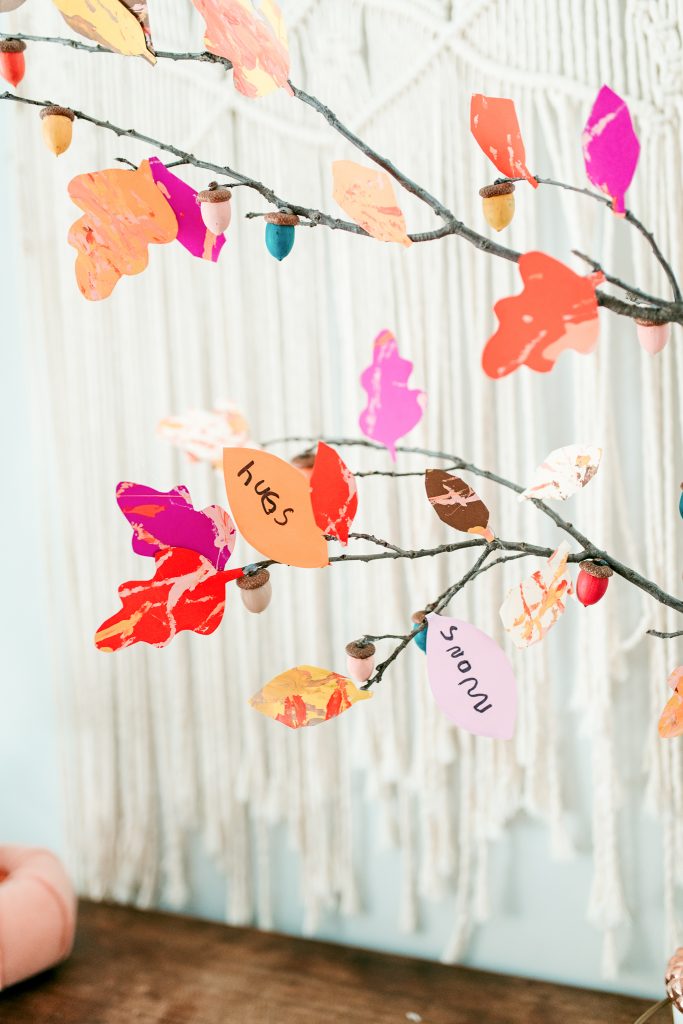
We gathered some acorns from outside, removed their “hats”, and dipped them into the fall colored paints, rolling them around with a spoon until they were completely covered. Place a piece of paper into your box and scoop out an acorn and drop it in. Next is the fun part – shake and roll the acorn around to make lines, squiggles, and other patterns! You can add more acorns to watch the colors mix!
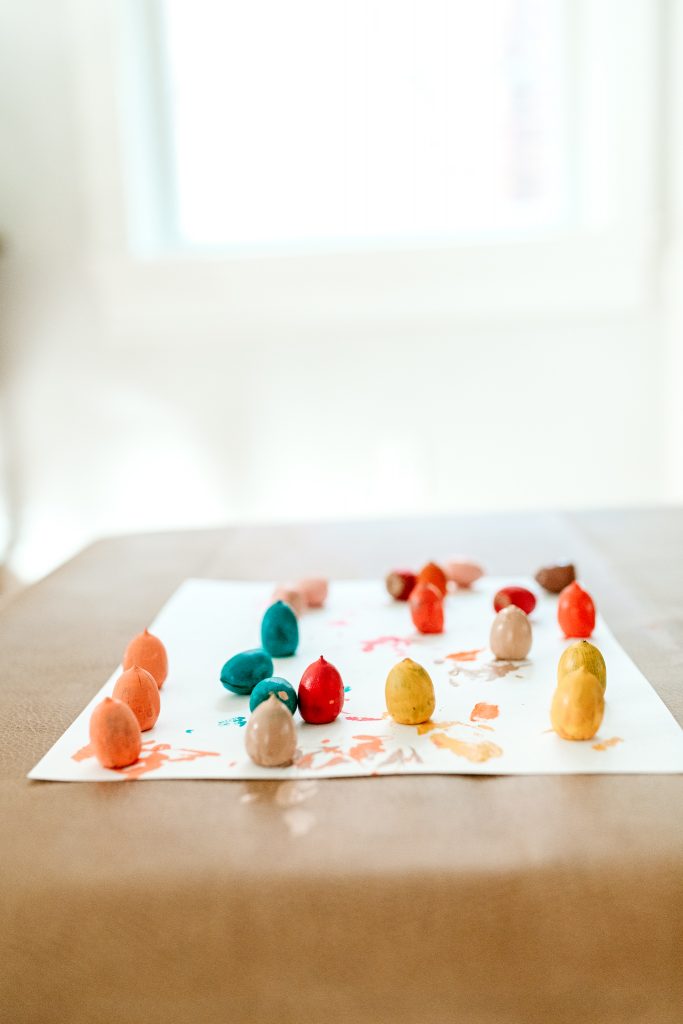
If you want to add acorns to your tree, once you’re done with your process art, you can use a brush to smooth the paint on them and let them dry. I found it easiest to do it this way and then hot glue their “hats” back on once they’re dry!
Part 2: Autumn Leaves
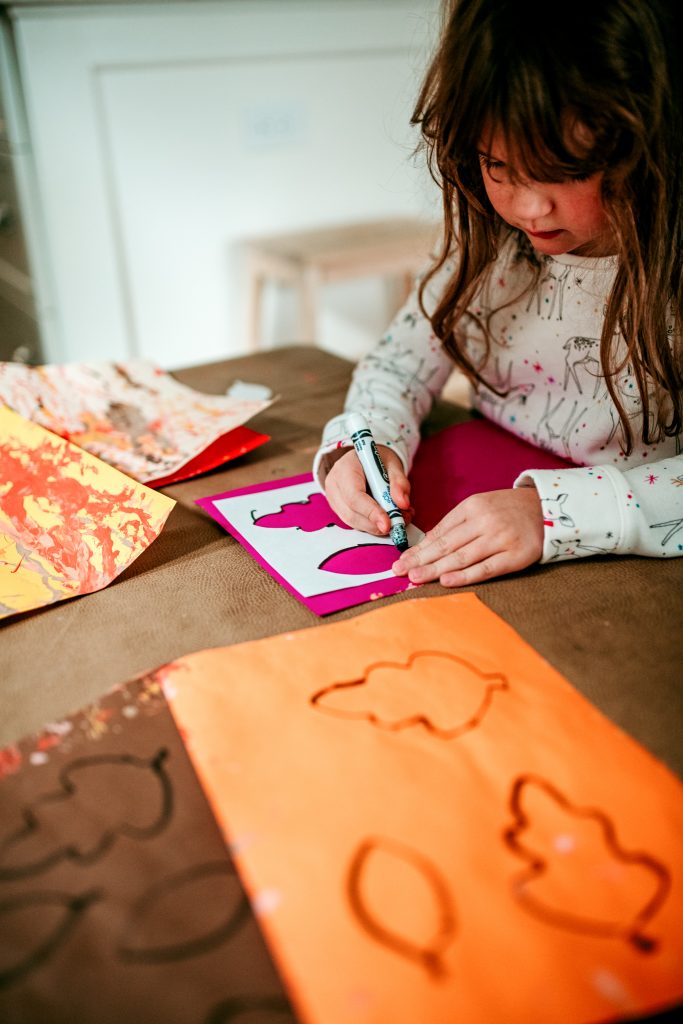
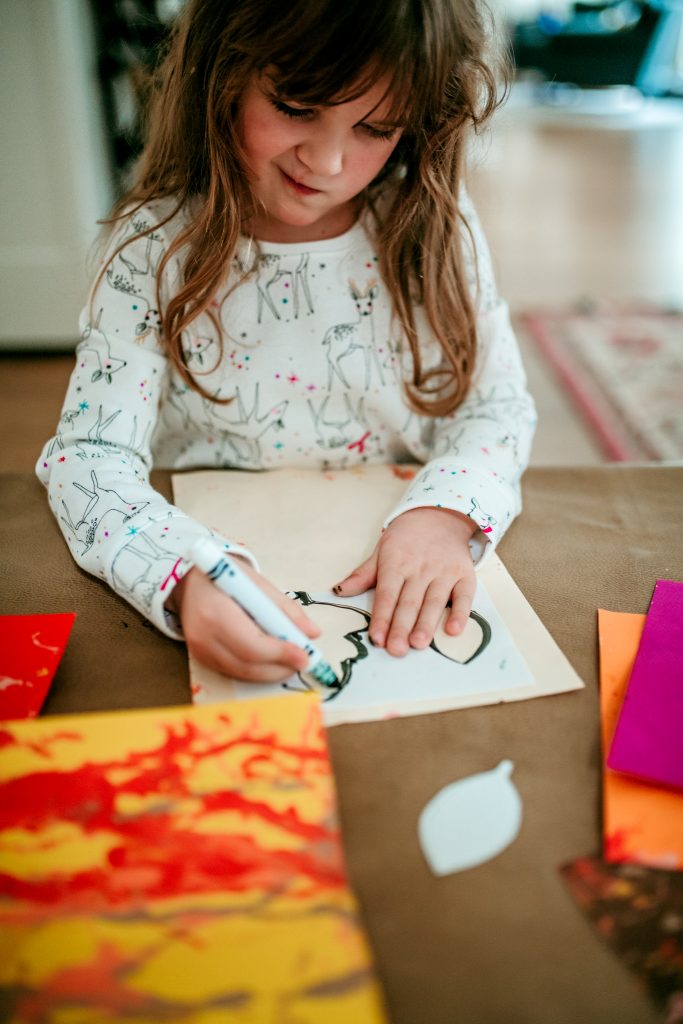
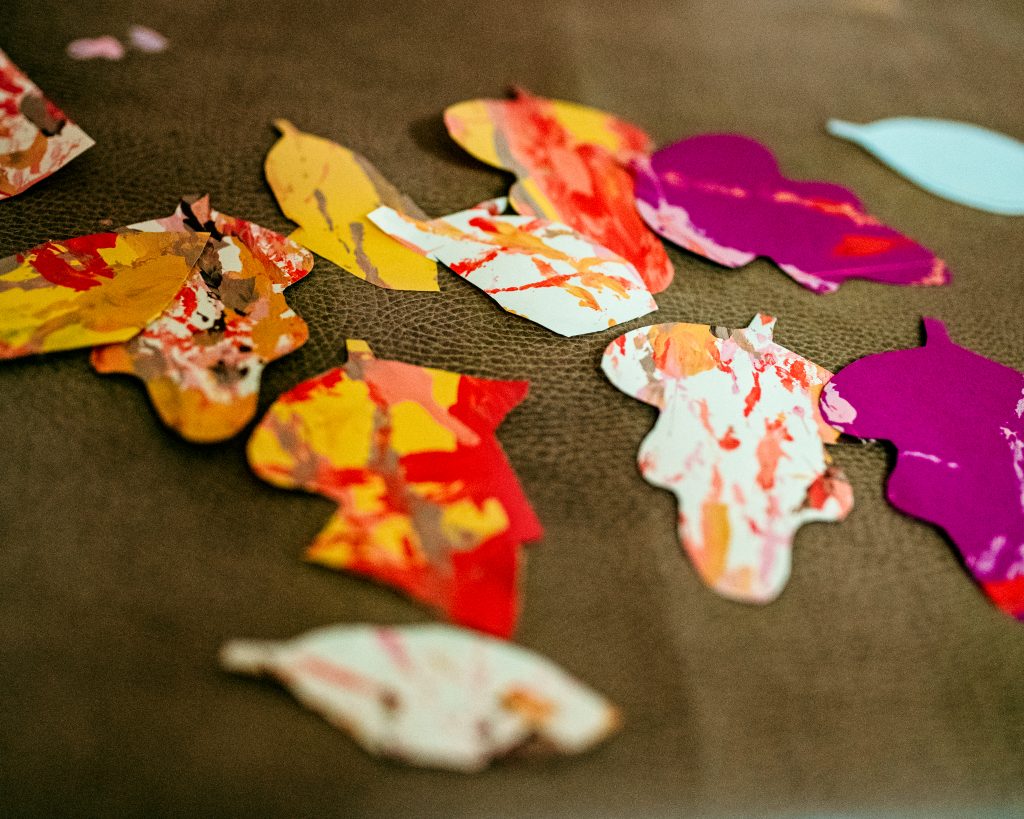
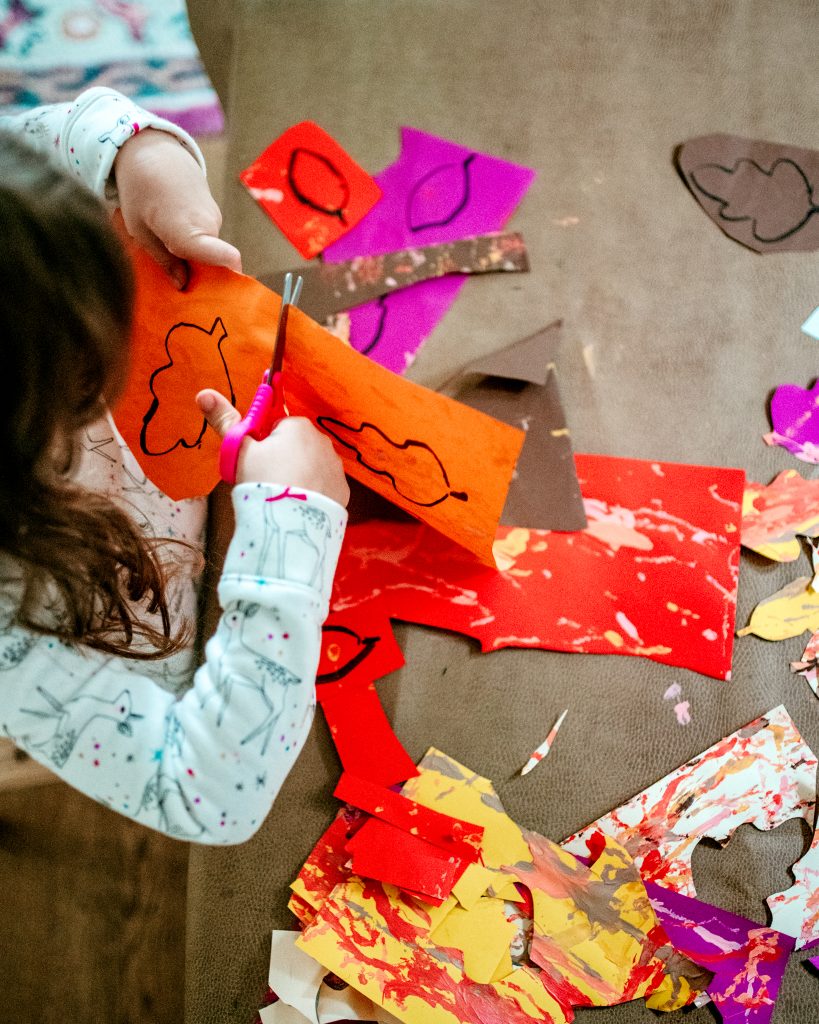
Once your acorn paintings have dried, flip them over to trace leaf stencils. To make the stencil, I just drew two simple leaf prints on cardstock and cut out the centers to create an easy to follow template that Harper would be able copy onto her paper and then cut out.
Part 3: Assemble your Thankful Tree Thanksgiving Craft
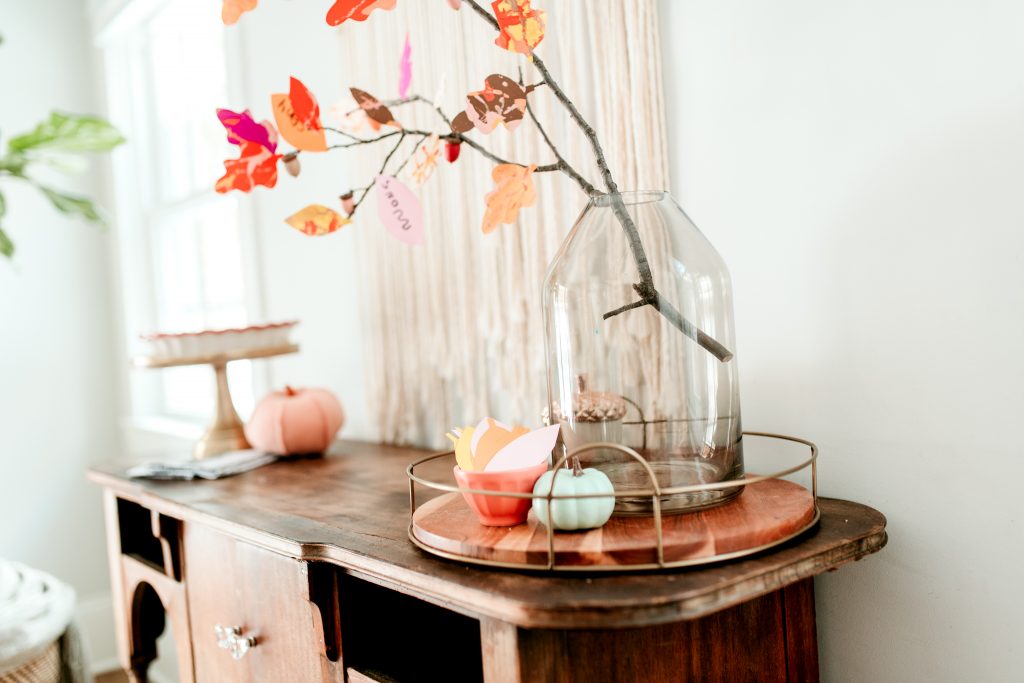
Putting everything together is always the most exciting part – especially when it means being able to display your kids’ artwork somewhere besides hanging on the refrigerator or taped to playroom wall. We ended up finding the perfect branch, but in case you are unable to, my backup plan was to arrange several sticks together to make a tree in the form of a stick “bouquet”.
I hot glued the acorns and leaves onto the branch and plan on using scotch tape to attach the rest of the blank “thankful for… ” leaves that the kids’ fill out each day until Thanksgiving.
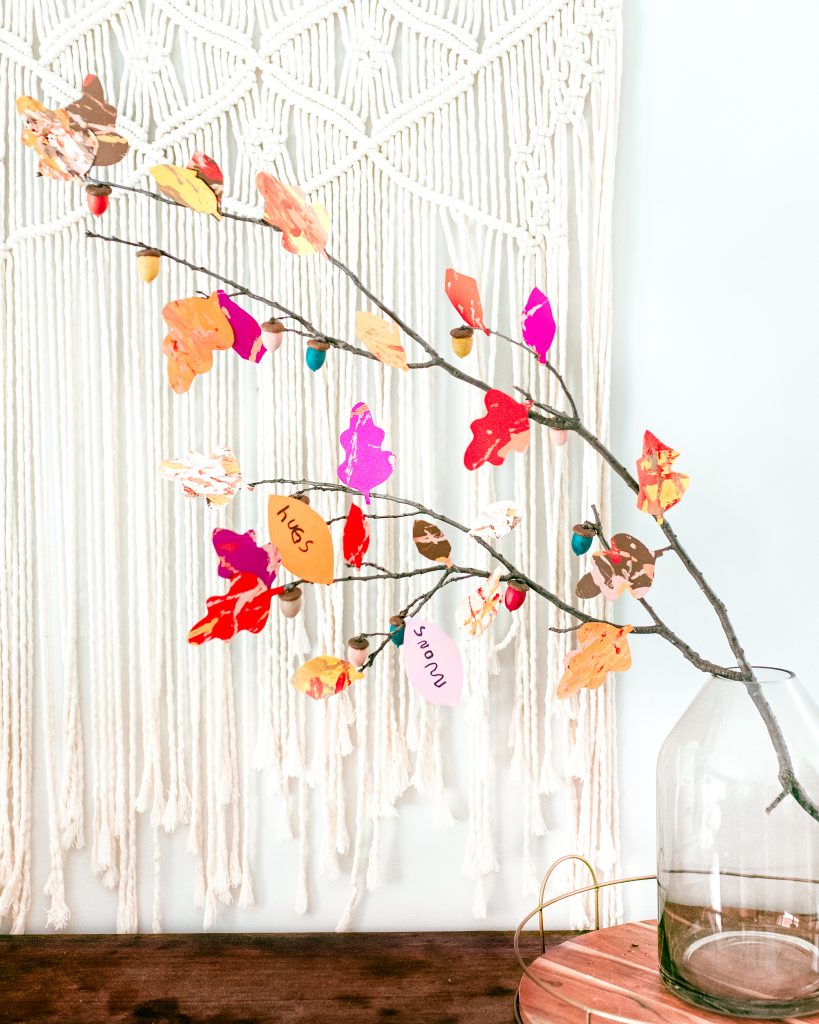
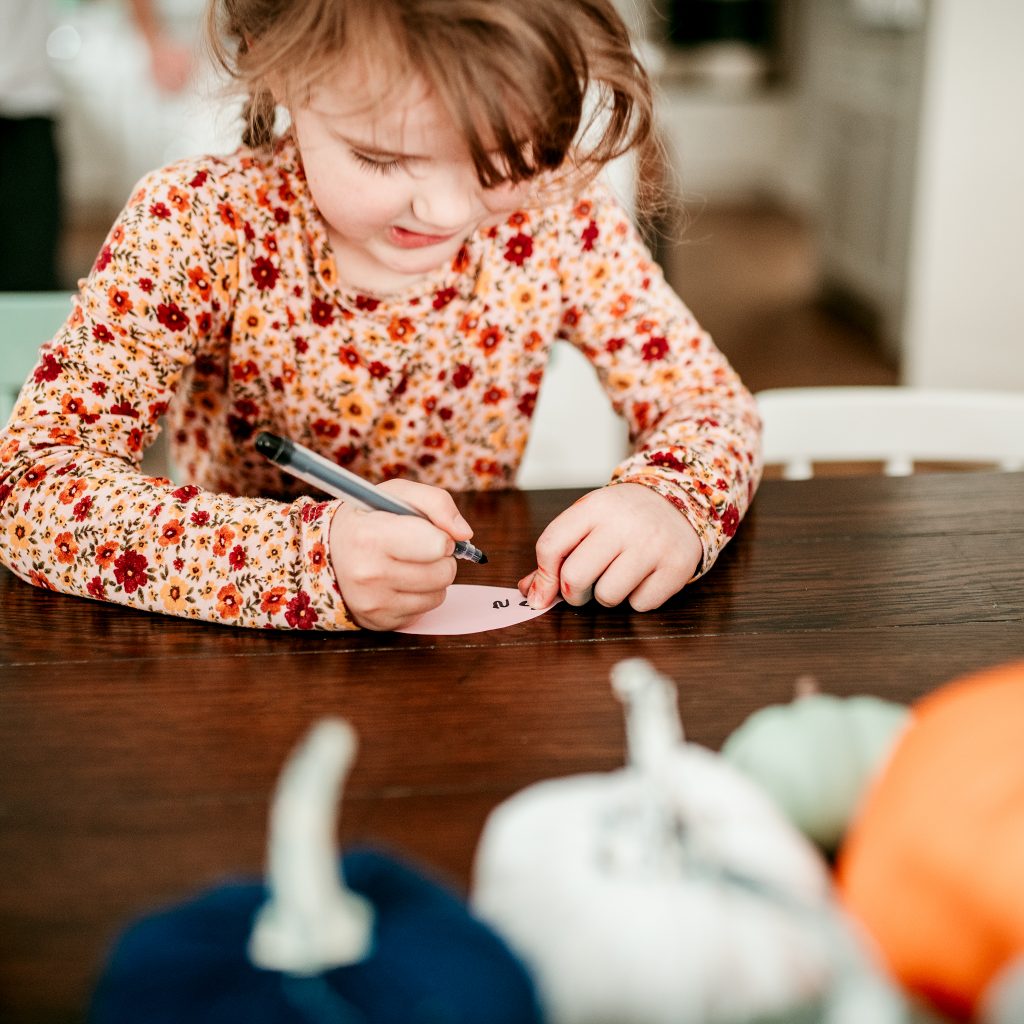
I can’t wait to hear about all of the things they are grateful for this season !!


What do you think?