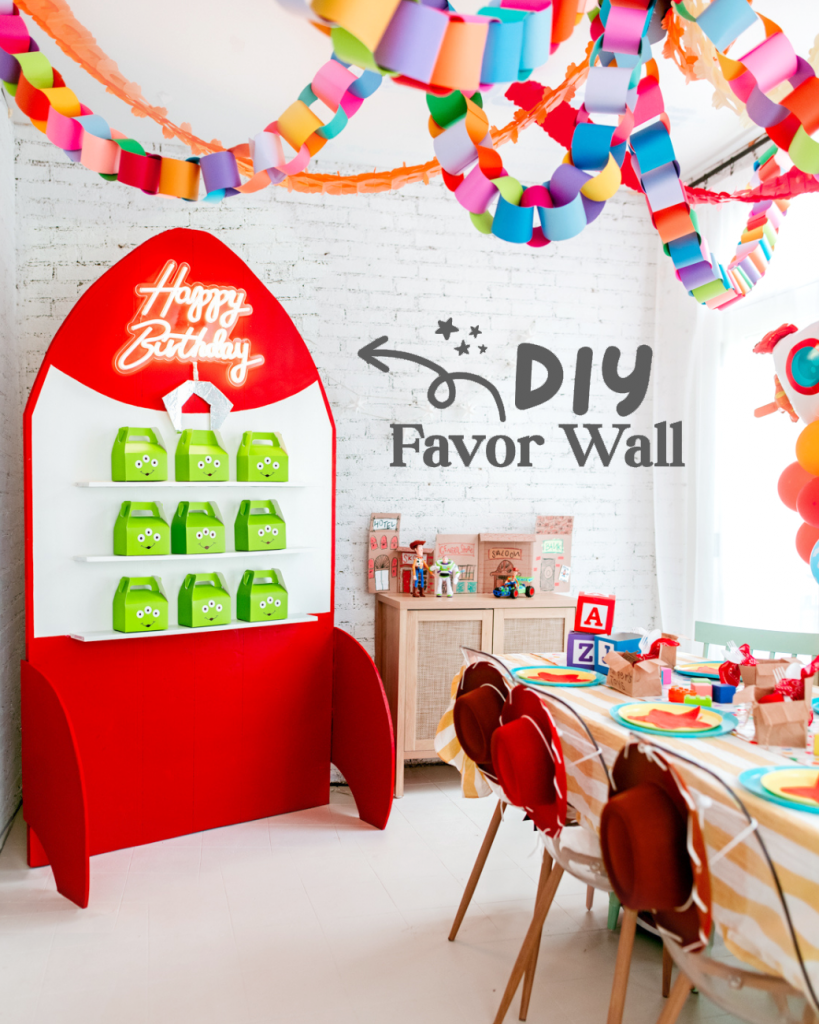
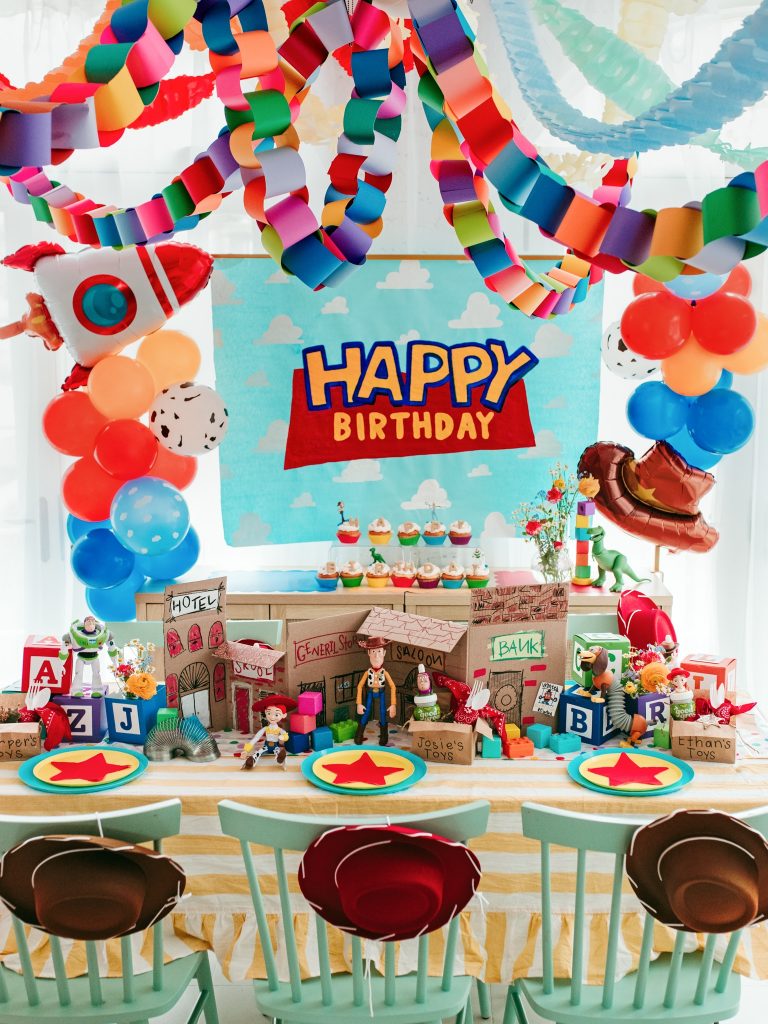
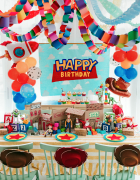
If there’s one thing about me, it’s that once I get an idea in my head… I have to figure out how to make it happen 🤪 And for this Toy Story birthday party, I could not stop thinking about creating a giant party favor wall inspired by The Claw from Pizza Planet!
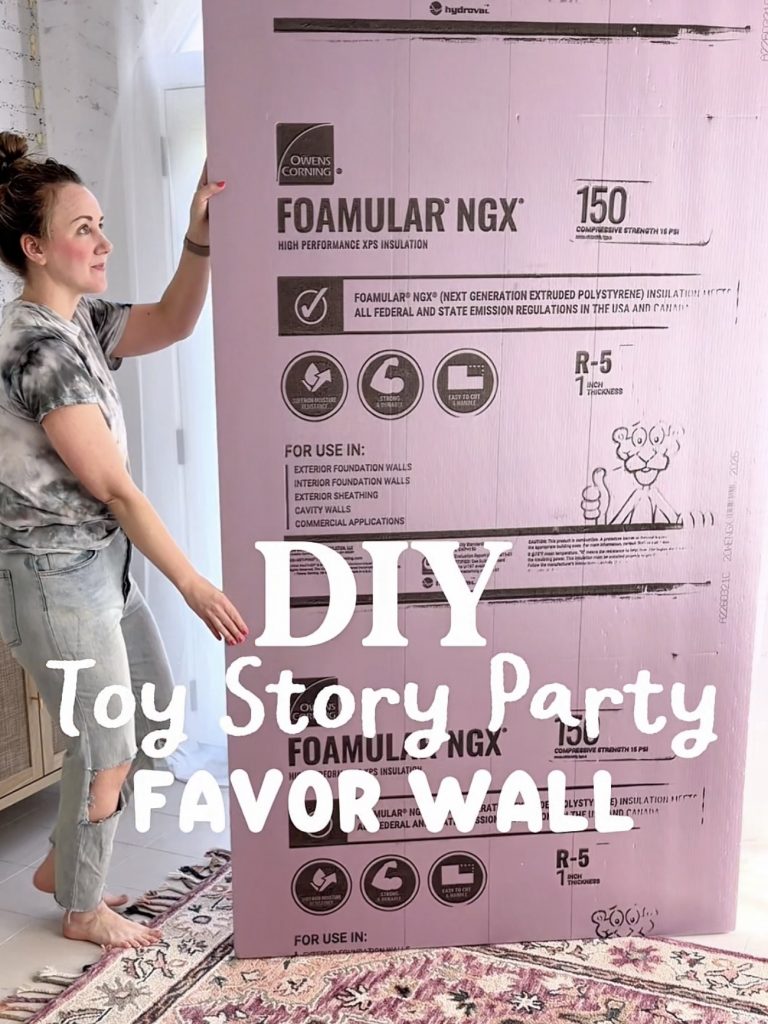
So naturally, I headed to the hardware store, grabbed foam insulation boards, and somehow convinced myself I could build a giant rocket-shaped display shelf for party favors 😅
And honestly? It ended up being surprisingly easy, budget-friendly, and one of my favorite DIY party projects I’ve ever made.
I love party decorations that do double duty, especially when planning kids birthday parties. This DIY Toy Story party decoration became the focal point of the entire party setup and worked as both a party backdrop and a functional party favor display.
I filled the shelves with little green alien favor boxes, drinks, and themed treats, and it instantly brought the whole Toy Story birthday party theme to life 🚀💚
If you’re looking for a creative high-impact DIY party backdrop that doesn’t require woodworking skills, here’s exactly how I made this giant Toy Story party favor wall (that can easily be customized for any party theme!).
Supplies You’ll Need
To make this DIY party favor wall, I used inexpensive materials from the hardware store and craft stash supplies I already had at home.

Materials
- 1” foam insulation board (for the main structure)
- 1/2” foam insulation board (for shelves and decorative pieces)
- Utility knife or foam cutting tool
- Gorilla Glue – clear gel
- Hot glue gun + glue sticks
- Toothpicks
- Interior paint
- Paint roller
- Painter’s Tape
- Pencil + ruler + level
- Wooden blocks or weighted objects
- Green favor boxes
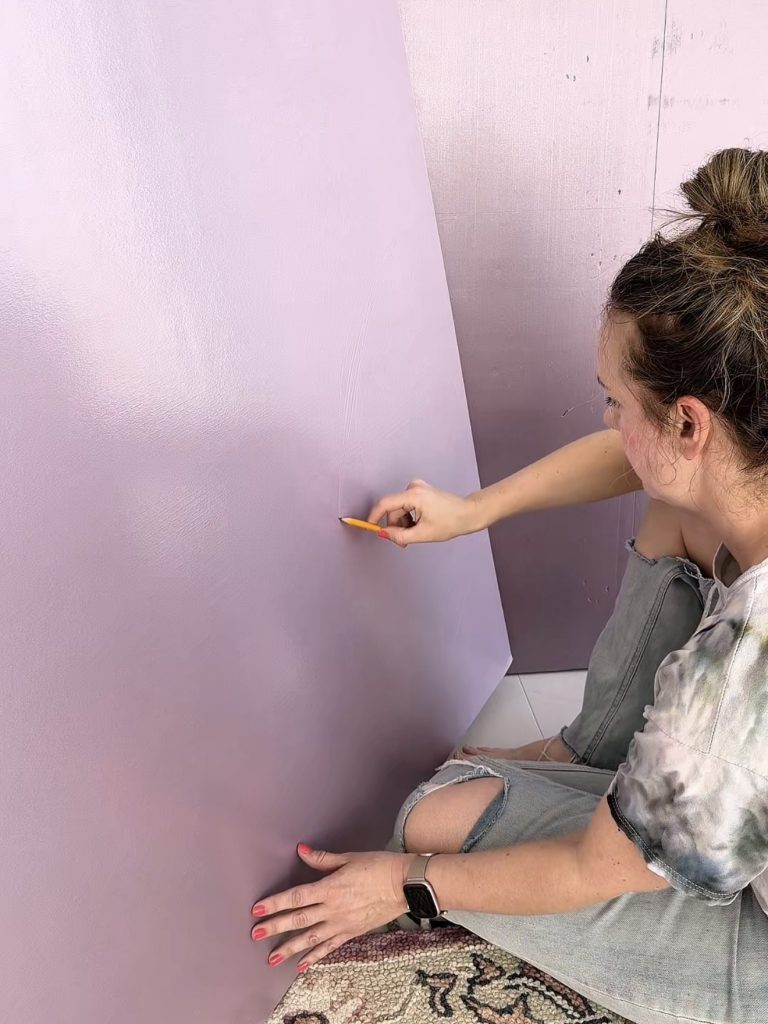
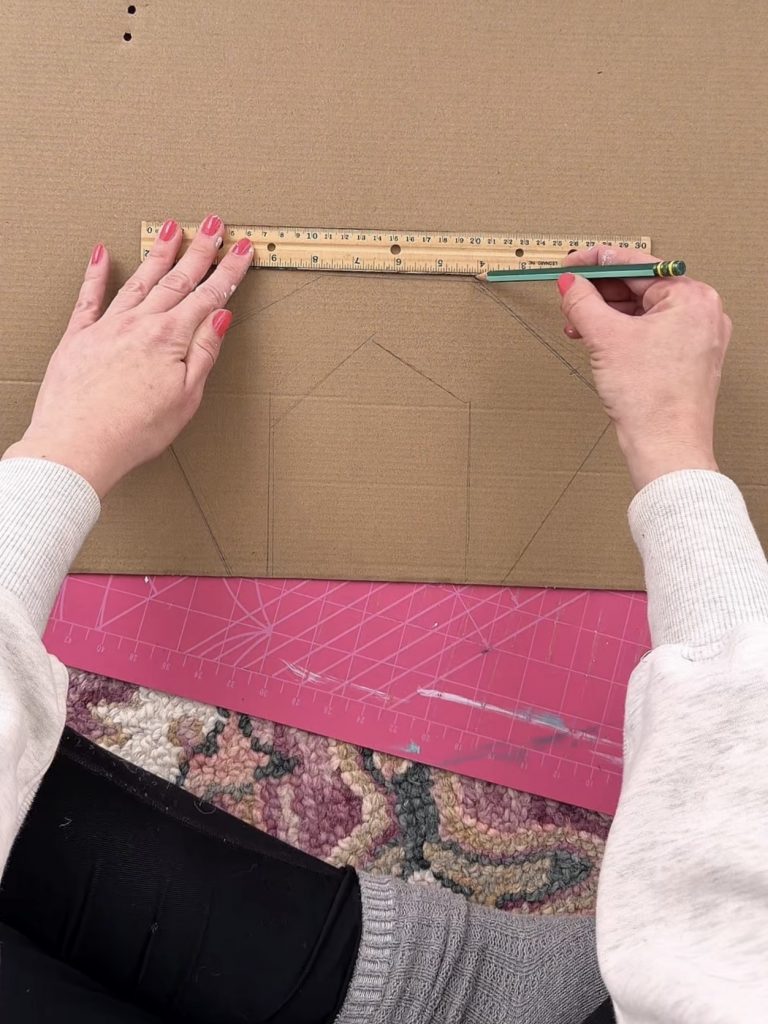
Step 1: Plan Your Design
Before cutting anything, I sketched out the oversized rocket shape I wanted for the wall. Since this was for a Toy Story birthday party, I leaned into the retro Pizza Planet aesthetic with bold colors, oversized rocket wings, and playful details inspired by The Claw machine.
One of the reasons I love using foam insulation board for DIY party decorations is because it’s lightweight, affordable, and easy to cut – but still creates a huge visual impact once assembled.
Step 2: Cut the Foam Pieces
Using a utility knife, I carefully cut all the pieces for the main rocket shape and shelves.
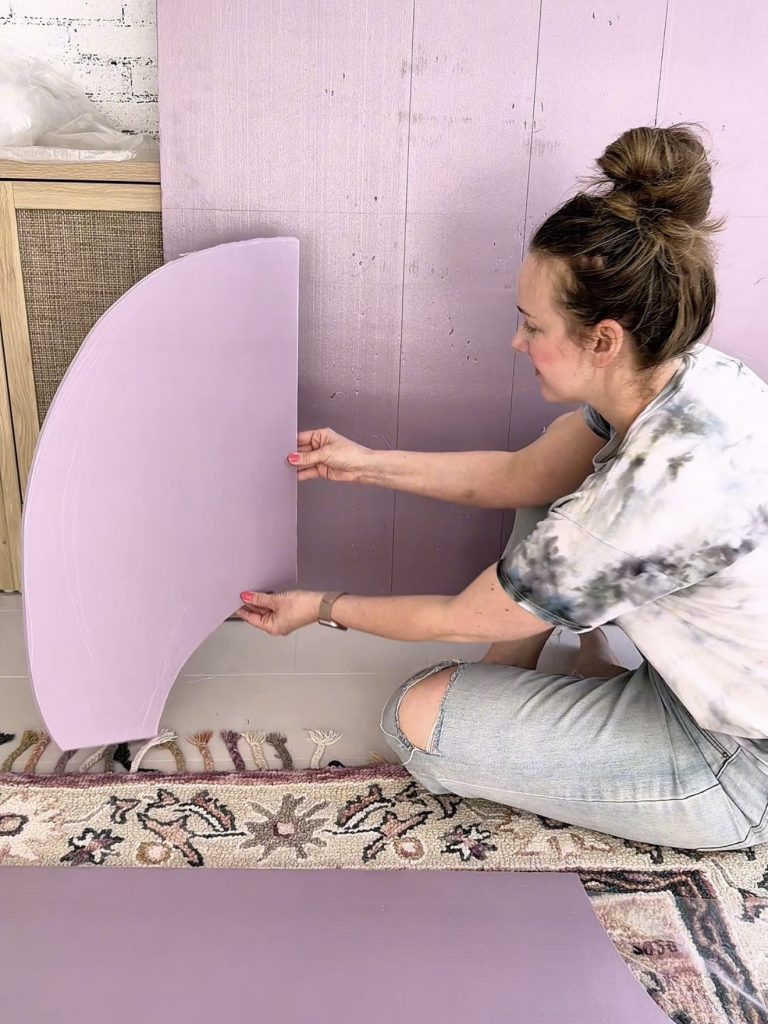
The main structure was cut from a single sheet of 1” foam insulation board.
The rocket wings were cut out of 1/2” foam board. The wings offered stability to keep my structure standing, but you can also cut 2 triangle pieces from the 1/2″ foam to attach to the back as support.
For the shelves, I cut long strips about 4” wide from the 1/2” foam board. This ended up being the perfect depth for holding party favor boxes, juice bottles, and small toys.
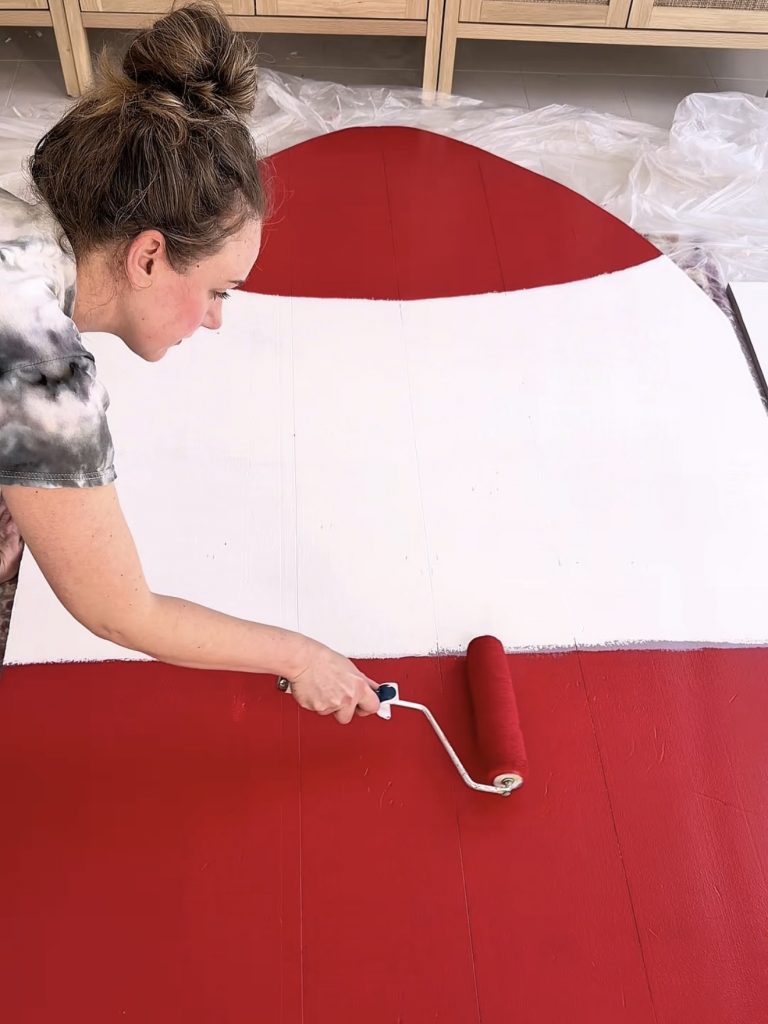
Step 3: Paint Everything
Once all the foam pieces were cut, I painted everything using regular interior paint.
I wanted this Toy Story party decoration to feel bright, playful, and colorful, so I used a bold Toy Story-inspired red (Glidden Red Gumball) to match the rest of the party setup.
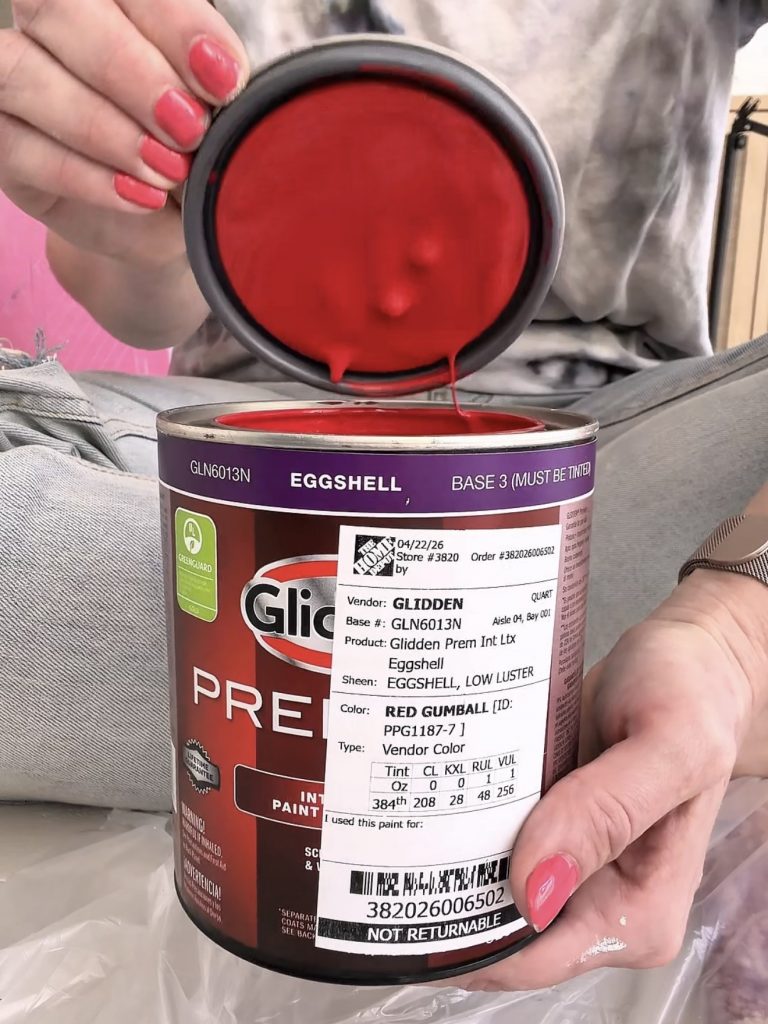
Painting before assembly made it much easier to reach all the edges and corners. I ended up doing 2–3 coats for full coverage.
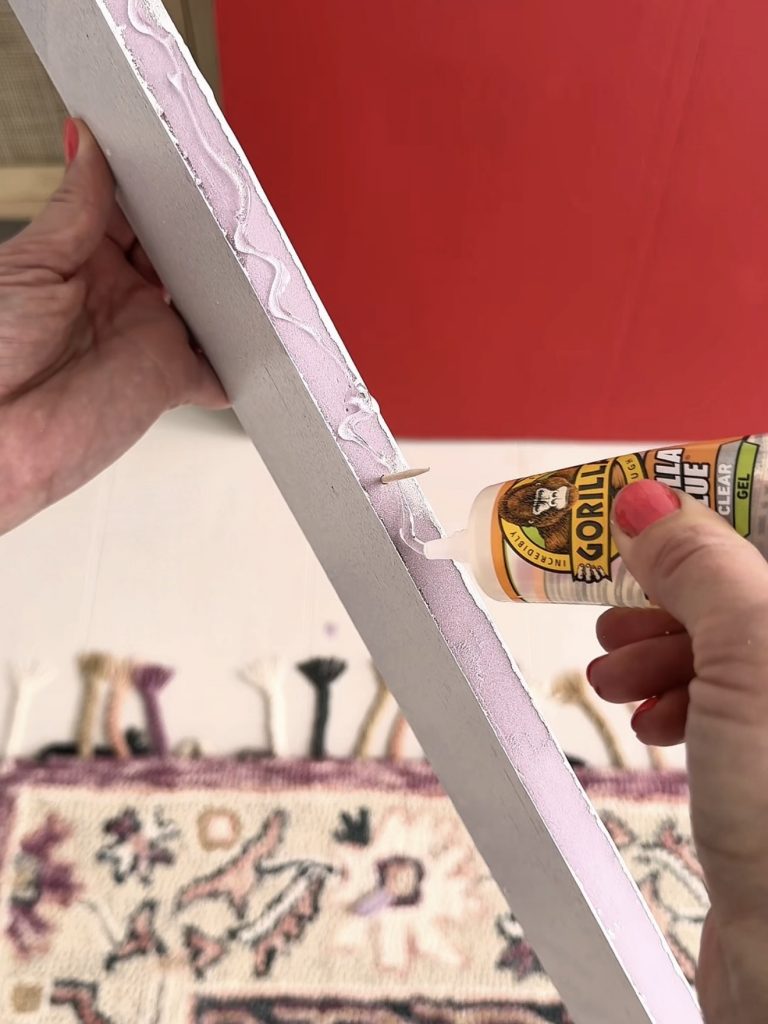
Step 4: Assemble the Shelves

This part definitely took the most trial and error 😅
What finally worked best was:
- Insert a few toothpicks along the shelf edge for support
- Add Gorilla Glue along the full edge
- Use a few dots of hot glue to temporarily stabilize the shelves while the Gorilla Glue cures.
The toothpicks acted almost like hidden anchors inside the foam and made a huge difference in stability.
While I wouldn’t plan to use these shelves to hold heavy items long term, they were absolutely sturdy enough for party favors, treat boxes, and juice bottles for the party.
If you’re making a DIY party favor display, this method worked surprisingly well without needing any complicated tools or hardware.I
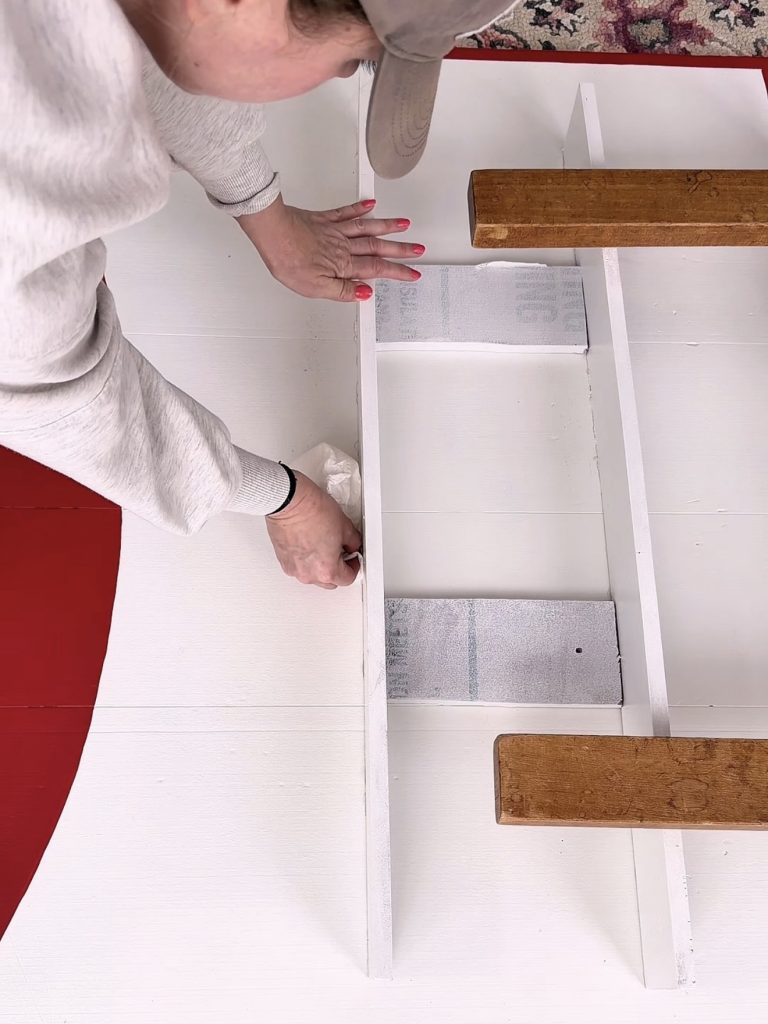
I laid the entire piece flat on the floor and made spacers to attach the shelves evenly. To keep the shelves from shifting while drying, I used wooden building blocks as weights to hold everything steady. This helped the shelves dry level and secure without sliding around.
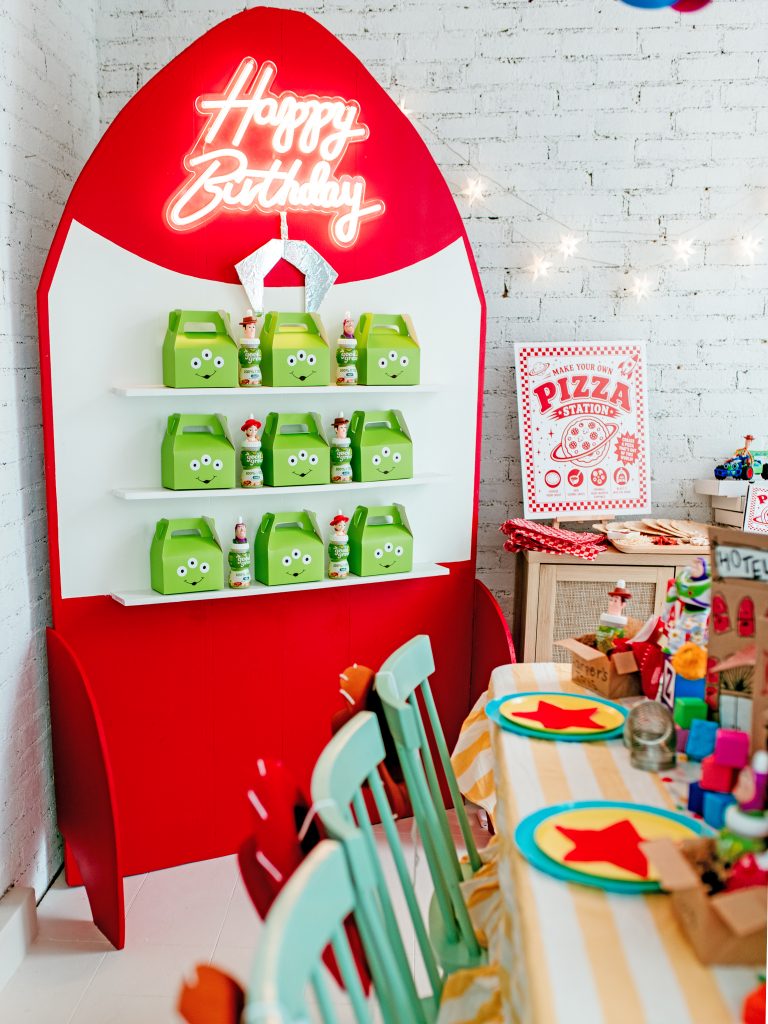
Step 5: Style Your Party Favor Wall
This was my favorite part – I just love seeing everything come together!
I added more details, like the cardboard claw cut-out that I covered with aluminum foil, and the Happy Birthday LED neon wall sign.
The shelves were filled with little green alien favor boxes that I DIYed, themed treats, drinks, and Toy Story-inspired goodies.
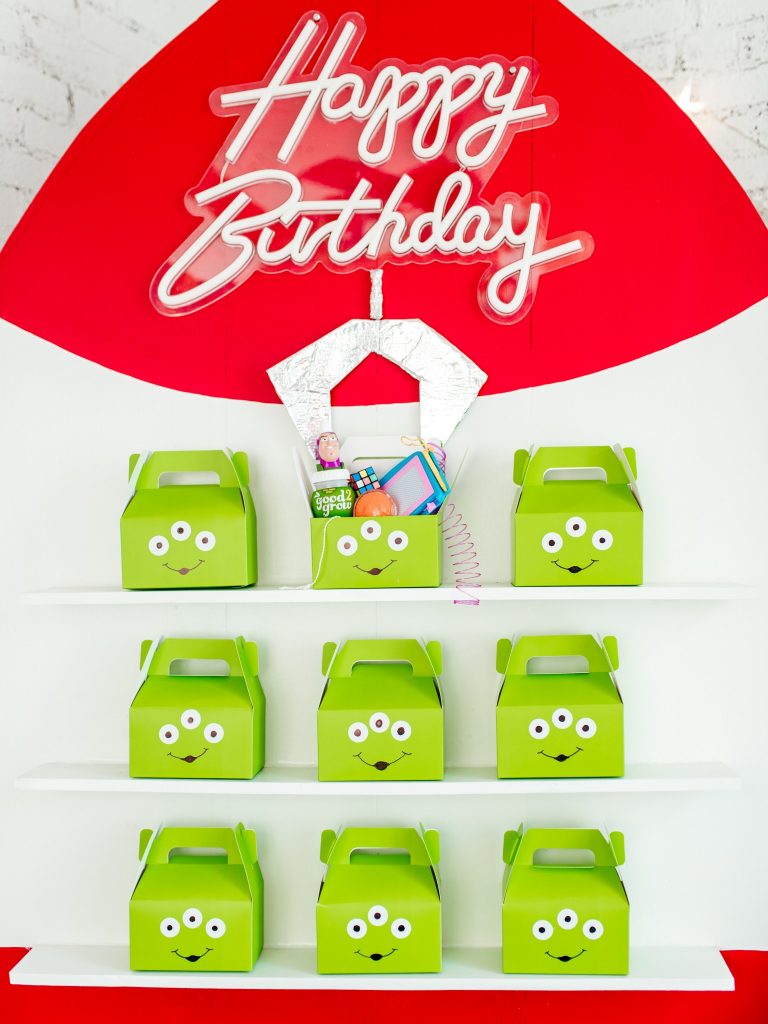
It became such a fun interactive decor piece and made the whole setup feel extra immersive.
Ready to Make Your Own?
This project definitely fell into the “labor of love” category, but it ended up being much more approachable than I expected. If you’re willing to get a little messy with paint and glue, you can create a HUGE party statement piece for way less than buying or renting custom decor.
I also love that this idea could work for so many different themes – just change the colors, shapes, and details to fit your party!
If you make your own version, I would LOVE to see it. Tag me so I can see your creations 🚀✨ And if you found this DIY Toy Story party tutorial helpful, be sure to save it for later and share it with someone planning a party!
Tap to see the whole Toy Story party!


What do you think?