Anyone else feeling totally over winter? I know I am! With cold temperatures, gray skies, and snow sticking around, I decided it was time to add a little springtime cheer to our home in the simplest, most colorful way possible: DIY window clings!
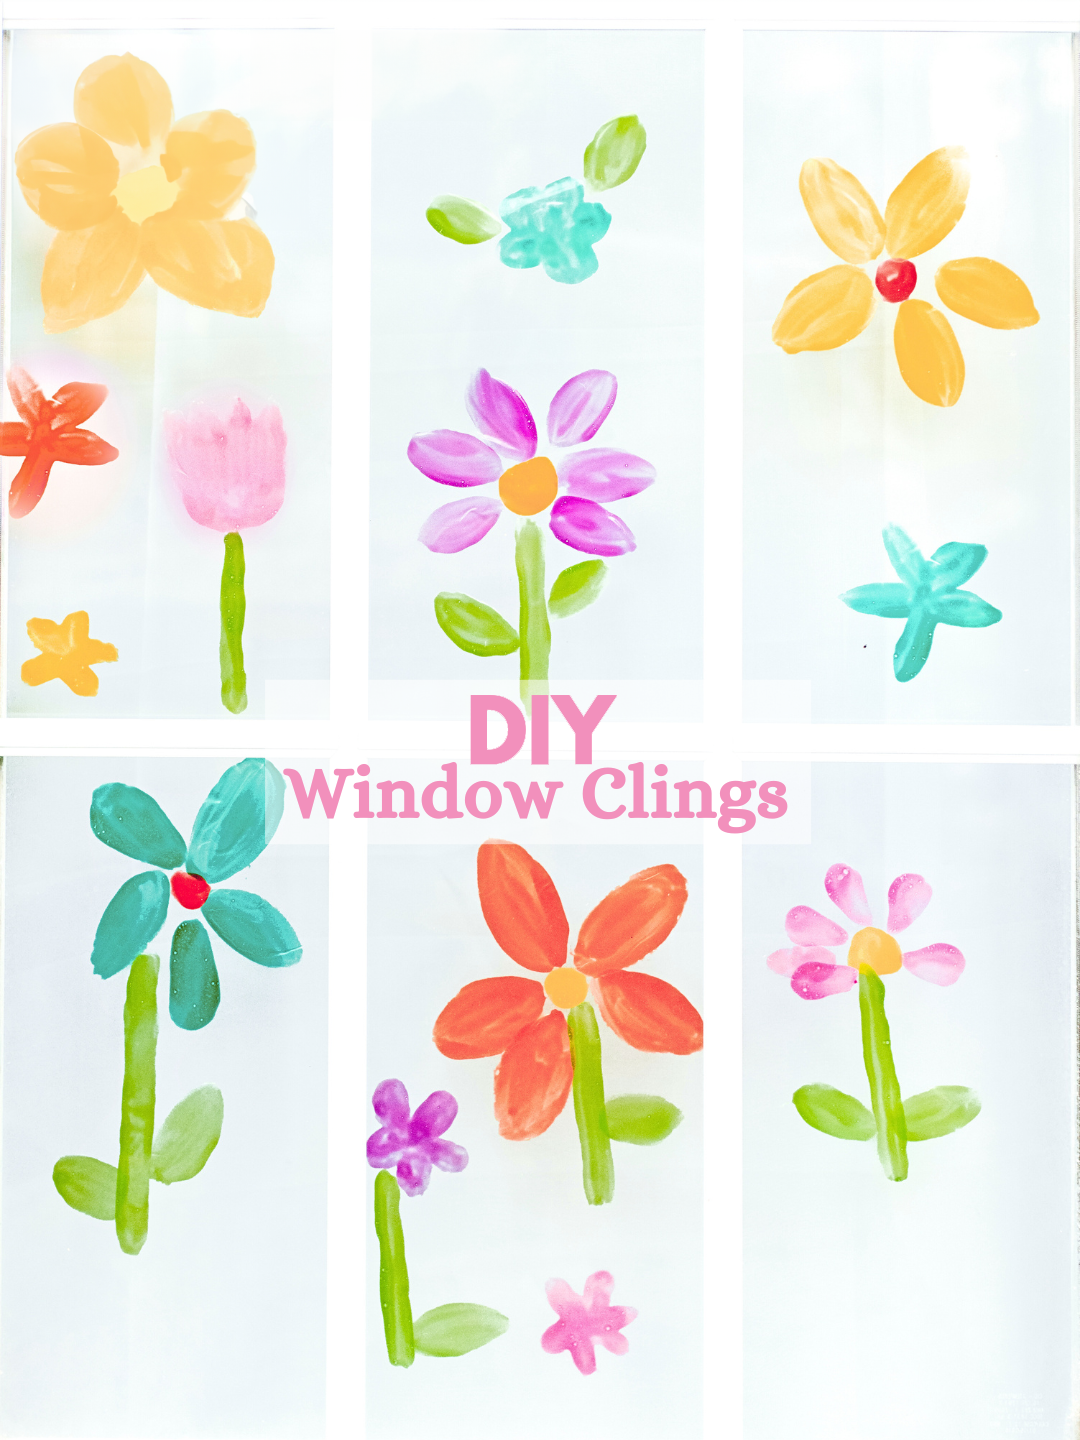
This fun, hands-on activity only requires three ingredients you probably already have at home. My kids loved it, and our windows have never looked so cheerful! Here’s how you can create your own window flower garden to brighten up those dreary winter days:


DIY Window Clings Recipe:
Supplies:
- 3 tablespoons Elmer’s White Glue
- 3-4 drops of dish soap
- 5-10 drops of food coloring (your choice of colors)
- Paintbrush
- Sheet protector (clear plastic sleeves)
Instructions:
- Mix: In a small bowl, combine the glue, dish soap, and food coloring. Stir well until fully blended.
- Paint: Dip your paintbrush into the mixture and paint designs onto a sheet protector. We created different shapes and sizes to make a flower garden, but feel free to make whatever you’d like – older kiddos can add more details to their designs. Tip: Thinner layers work best! They’re more like film clings rather than thick jelly clings.
- Dry: Allow your designs to dry completely, which usually takes a few hours.
- Peel & Stick: Once dry, gently peel the clings from the sheet protector and stick them onto your windows. Arrange them into beautiful, cheerful scenes!
These DIY window clings instantly add brightness and color to your home. Plus, it’s a great activity to keep the kids busy indoors. I hope these window flowers bring a little sunshine into your home until spring officially arrives!


What do you think?